 花哨的PARTY闪光的字体啊 PS教程.docx
- 文档编号:30705218
- 上传时间:2023-08-19
- 格式:DOCX
- 页数:17
- 大小:787.87KB
花哨的PARTY闪光的字体啊 PS教程.docx
《花哨的PARTY闪光的字体啊 PS教程.docx》由会员分享,可在线阅读,更多相关《花哨的PARTY闪光的字体啊 PS教程.docx(17页珍藏版)》请在冰豆网上搜索。
花哨的PARTY闪光的字体啊PS教程
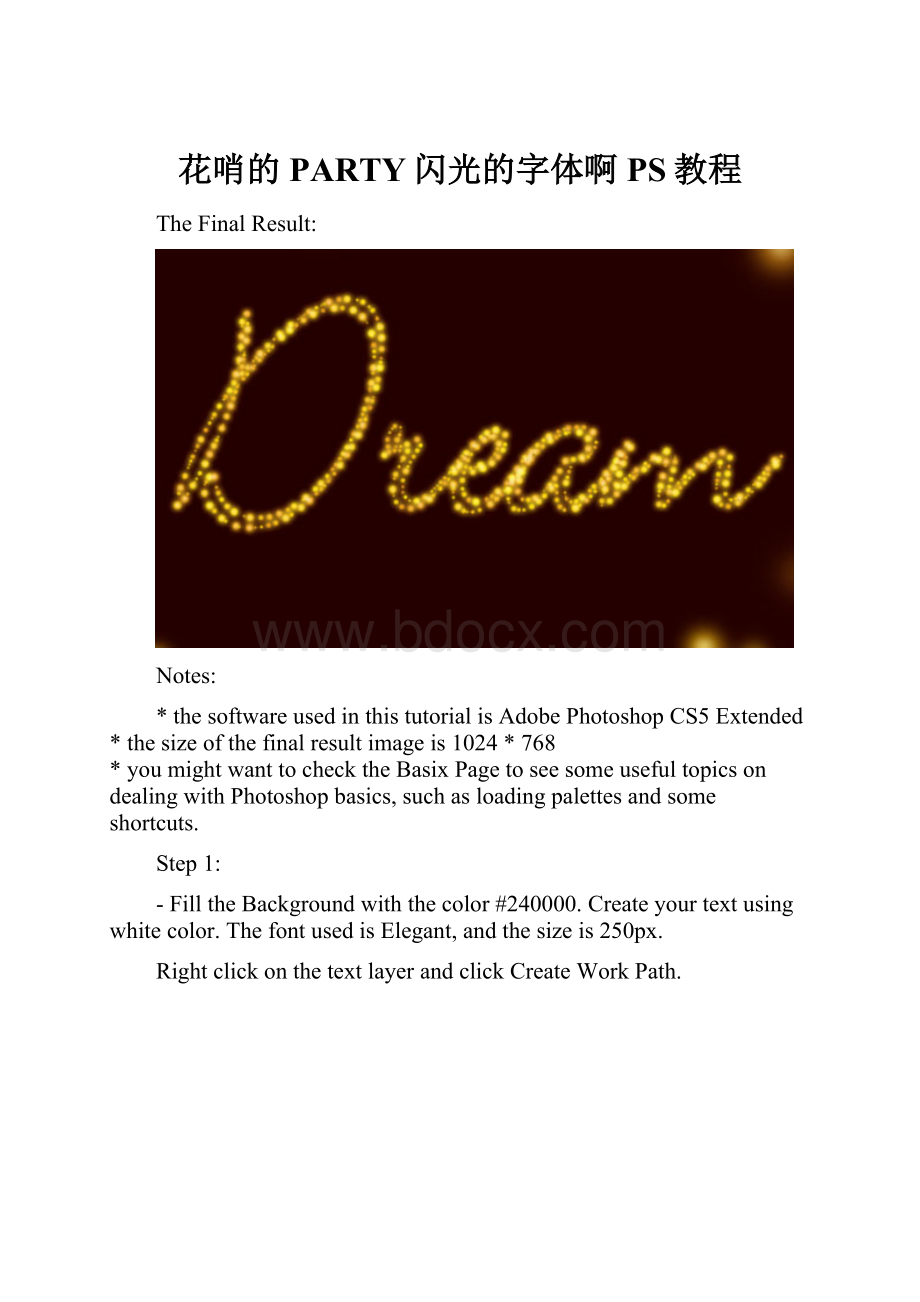
TheFinalResult:
Notes:
*thesoftwareusedinthistutorialisAdobePhotoshopCS5Extended
*thesizeofthefinalresultimageis1024*768
*youmightwanttochecktheBasixPagetoseesomeusefultopicsondealingwithPhotoshopbasics,suchasloadingpalettesandsomeshortcuts.
Step1:
-FilltheBackgroundwiththecolor#240000.Createyourtextusingwhitecolor.ThefontusedisElegant,andthesizeis250px.
RightclickonthetextlayerandclickCreateWorkPath.
-Createanewlayerandrenameitto“Stroke”,thenmakethetextlayerinvisiblebyclickingontheeyeiconnexttoit.SettheForegroundcolorto#e89819andtheBackgroundcolorto#fddd03.
Step2:
-Wearegoingtomodifythesettingsofthebrushusedtocreatethestroke.SoopentheBrushpanel(Window->Brush),andchooseahardbrush.ChangetheSizeto7pxandtheSpacingto150%.
-UnderShapeDynamics,changetheSizeJitterto100%.
-AndunderColorDynamics,changetheForeground/BackgroundJitterto100%aswell.Theothervaluesshouldbesetto0.
-Nowgobacktotheworkpath,grabtheDirectSelectiontool,rightclickonthepath,andclickStrokePath.ChooseBrushfromtheTooldropdownmenu,andmakesurethattheSimulatePressureboxisun-checked.
-HitEntertogetridofthepath,thisishowthestrokeshouldlooklike.
Step3:
-Duplicatethe“Stroke”layer,thenchangeits(theoriginalStrokelayer)BlendModetoPinLight.
-Makesurethattheoriginal“Stroke”layerisstillselected,andgotoFilter->Blur->GaussianBlur.ChangetheRadiusvalueto3.
-Youshouldgetaresultsimilartothis:
Step4:
Doubleclickonthe“Strokecopy”layertoapplythefollowingstyles:
-OuterGlow:
Changethecolorto#9f9f28,theSizeto6,theContourtoValley–HighandtheRangeto100.
-InnerGlow:
ChangetheSourcetoCenter.Thiswillmaketheglowemanatefromthecenterinsteadoftheinneredges,whichgivesareallycooleffect.Also,changetheSizeto4.
-Thestylesappliedshouldmakeyourtextglow.
Step5:
-It’stimetocreatetheBackgroundnow.Solet’sstartwiththebrushused:
-IntheBrushpanel(theBrushToolshouldbeselected),chooseabigsoftbrush.TheSizeshouldbesomethingaround70px,andtheSpacingabout150%.
-UnderShapeDynamics,changetheSizeJitterto100%.
-UnderScattering,changetheScatterto350%,theCountto3andtheCountJitterto35%.
-FortheColorDynamics,changetheForeground/BackgroundJitterto100%.Othervaluesshouldbesetto0.
-Finally,forTransfer,justchangetheOpacityJitterto100%.
Step6:
-CreateanewlayerunderbothStrokelayers,andrenameitto“BG”.TheForegroundandBackgroundcolorsshouldbethesameasinStep1.GrabtheEllipseTool,andclickthePathsbuttonintheoptionsbar,thiswillenableyoutodrawapathinsteadofafilledshape.
-Drawanellipsearoundthetext.Leaveenoughdistancebetweenthepathandthetexttoavoidoverlapping.
-Rightclickonthepath,clickStrokePath,chooseBrushandmakesuretheSimulatePressureboxisun-checked.
-HitEntertogetridofthepath.
-Doubleclickonthe“BG”layertoaddasimpleInnerGlow,justchangetheSourcetoCenter.
Youcanusethebrushtoaddmoresparklesifyouthinksomeareasarestillempty.Andthisisthefinalresult.


- 配套讲稿:
如PPT文件的首页显示word图标,表示该PPT已包含配套word讲稿。双击word图标可打开word文档。
- 特殊限制:
部分文档作品中含有的国旗、国徽等图片,仅作为作品整体效果示例展示,禁止商用。设计者仅对作品中独创性部分享有著作权。
- 关 键 词:
- 花哨的PARTY闪光的字体啊 PS教程 花哨 PARTY 闪光 字体 PS 教程
 冰豆网所有资源均是用户自行上传分享,仅供网友学习交流,未经上传用户书面授权,请勿作他用。
 案例分析.docx
-
安徽国际商务职业学院国际商务.docx
-
八年级十六班家长会教师发言稿材料共六篇.docx
-
安徽省长丰县17届高考语文一轮复习压缩语段教案.docx
-
变色龙.docx
-
拨叉课程设计说明书.docx
-
部编版六年级语文下册期末复习句子专项.docx
-
部编道德与法治六年级下册全册教案教学设计.docx
-
部队后勤个人年终工作总结范文三篇.docx
-
110kv燕子砭变输变电工程项目管理实施规划施工组织设计完整版.docx
-
111信息系统管理业务流程.docx
-
554途观18TSI发动机结构组成及常见故障诊断详解.docx
-
564#软件系统开发技术资料.docx
-
5000亩特色中药材种植基地建设项目可行性研究报告.docx
-
9001内审文件人力资源控制文件.docx
-
Adobe Photoshop作业.docx
-
cad的基本内容.docx
-
Android平台下校园信息管理系统客户端的设计与实现毕业论文设计.docx
-
PEP四年级英语上册 Unit 4 单元教案 4 精品.docx
-
L02LabBook.docx
-
MRI技师上岗证真题及解析.docx
-
S1000D SNS基于MILSTD1808.docx
-
T梁预制及安装分部工程开工报告.docx
-
pep小学英语三年级说课稿和教案.docx
-
vray教程板书模板.docx
-
SAP物料主数据全面解释.docx
-
U8听力原文与答案.docx
-
XX大学生英语演讲稿4篇.docx
-
XX年教师评职称工作总结.docx
-
webservice环境搭建.docx
-
XX四年级数学上册全册集体备课教案新教材苏教版.docx
-
XX地区老年大学项目建设可行性研究报告.docx
-
交通安全三字经.docx
-
电热综合能源系统中热力管网动态建模及协调运行研究综述.docx
-
因为打牌写给老婆的检讨书范文.docx
-
精品S版小学语文第一册教案.docx
-
范文工作总结总工会换届经审工作报告大全精选.docx
-
中国传质设备市场竞争形势分析与投资战略研究报告.docx
-
六年级上册语文知识树完整版.docx
-
中考真题物质的推断与鉴别.docx
-
你就是自己的品牌徐汇教育.docx
-
中考物理经典计算题压轴题精选.docx
-
注会综合考试职业道德和审计.docx
-
最新八年级语文上学期6.docx
-
最新教师招聘考试复习资料划重点考点梳理.docx
-
《猴王出世》读后感.docx
-
5万吨三氯酚项目可行性研究报告.docx
-
19春西南大学1128《分析化学一》在线作业题目.docx
-
617学年下学期七年级期中考试数学试题附答案7.docx
-
GSP冷链及监测系统验证方案.docx
-
XX国际大酒店APP及微信公众平台建设项目可行性方案.docx
