 地理信息系统编程设计报告Word下载.docx
- 文档编号:22367971
- 上传时间:2023-02-03
- 格式:DOCX
- 页数:76
- 大小:748.97KB
地理信息系统编程设计报告Word下载.docx
《地理信息系统编程设计报告Word下载.docx》由会员分享,可在线阅读,更多相关《地理信息系统编程设计报告Word下载.docx(76页珍藏版)》请在冰豆网上搜索。
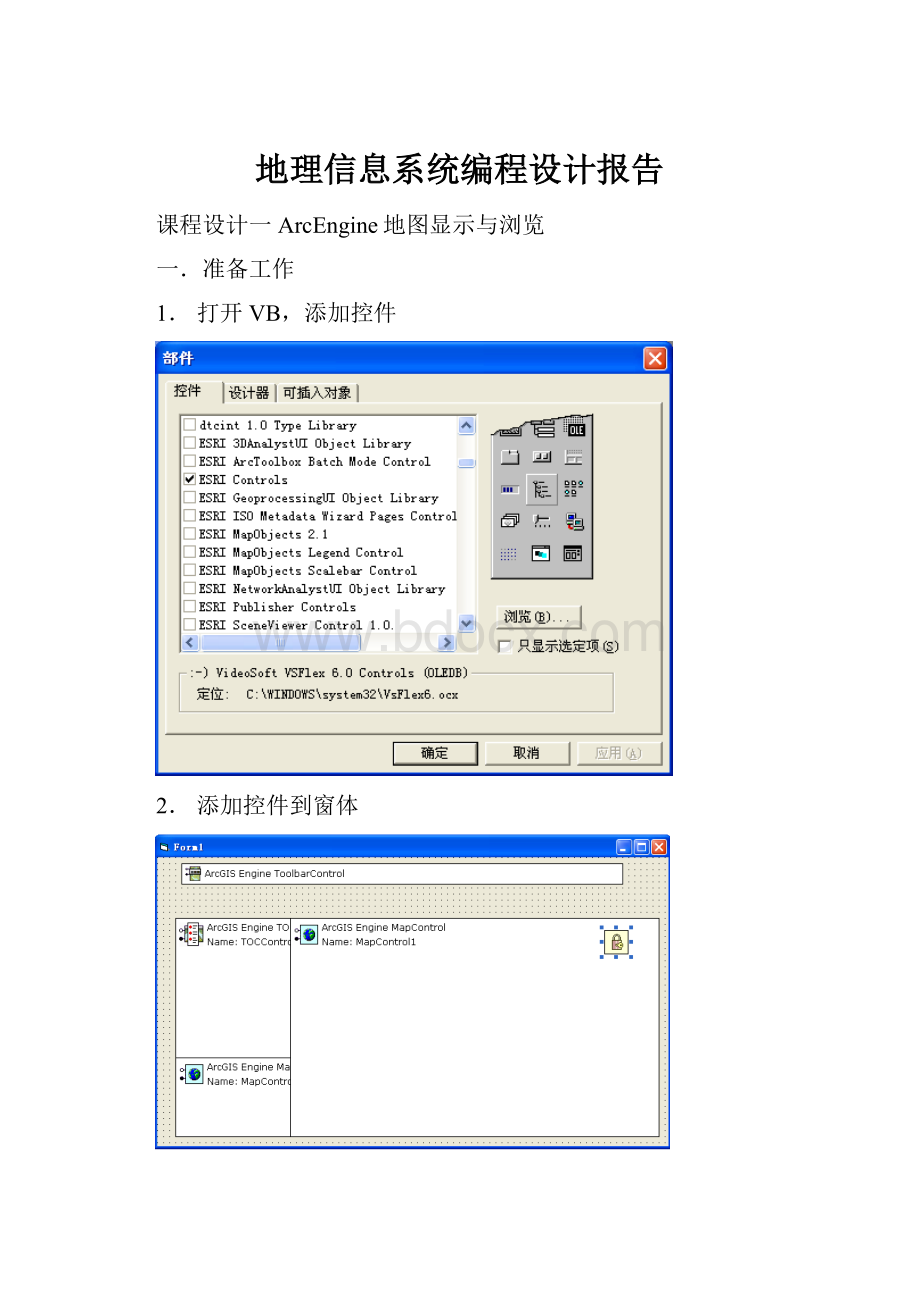
添加图层"
Set.ObjectFilter=pGxFilter
.DoModalOpenMe.hWnd,pEnumGxObjects
=========================
如果是保存
保存..."
.DoModalSaveMe.hWnd
EndWith
IfpEnumGxObjectsIsNothingThenExitSub
pEnumGxObjects.Reset'
重置枚举器
遍历所有在GxDialog对话框中选择的对象,并加载到MapControl
SetpGxDataset=pEnumGxObjects.Next
WhileNotpGxDatasetIsNothing
SetpLayer=NewFeatureLayer
SetpLayer.FeatureClass=pGxDataset.Dataset
pLayer.Name=pLayer.FeatureClass.AliasName
Me.MapControl1.AddLayerpLayer
下一个
Wend
Me.TOCControl1.Update'
刷新TocControl
CallSmallMap_UpDateData
Me.SmallMap.Refresh
DimpmapAsIMap
DimaAsInteger
得到控件中地图
Setpmap=MapControl1.Map
清空combo控件中文字
Combo1.Clear
遍历所有图层将图层名称加入combo控件
Fora=0Topmap.LayerCount-1
Combo1.AddItempmap.Layer(a).Name
Next
初始显示最上层图层名称
Combo1.ListIndex=0
m_moveft=False
EndSub
运行效果:
(3)编程实现MapControl中图层的移动、隐藏和卸载
这三种功能均需要调用函数GetLayerByName
PrivateFunctionGetLayerByName(ByRefMapctrlAsMapControl,ByValstrNameAsString)AsILayer
Dimi,CountAsInteger
WithMapctrl
Count=.LayerCount
Fori=0ToCount-1
If(.Layer(i).Name=strName)Then
SetGetLayerByName=.Layer(i)
ExitFunction
EndIf
Next
EndWith
EndFunction
1.移动图层
PrivateSub图层移动_Click()
DimlyerAsILayer
OnErrorGoToErr
Setlyer=GetLayerByName(Form1.MapControl1,Combo1.Text)
Form1.MapControl1.Map.MoveLayerlyer,Int(Text1.Text)
Form1.MapControl1.Refresh
Form1.SmallMap.Refresh
ExitSub
Err:
MsgBox"
输入图层不存在,请重新输入"
Eg:
将办公楼图层移动到第0层
结果:
该图层到达第0层
2.图层的隐藏
PrivateSub图层隐藏_Click()
Setlyer=GetLayerByName(Form1.MapControl1,Combo1.Text)
lyer.Visible=False
Form1.MapControl1.Refresh
Form1.SmallMap.Refresh
ExitSub
MsgBox"
隐藏道路1图层
隐藏前
隐藏后
在Mapcontrol中已经没有,但是TOCControl中依然存在,只是未被勾选
3.图层卸载
PrivateSub图层卸载_Click()
DimlyerAsILayer
Form1.MapControl1.Map.DeleteLayerlyer
运行效果
卸载跑道图层
卸载前:
卸载后:
可以看到Mapcontrol和TOCControl中都没有这个图层了。
(4)编程实现地图浏览操作,主要包括漫游、全图显示、放大缩小
PrivateSubMapControl1_OnMouseDown(ByValbuttonAsLong,ByValshiftAsLong,ByValXAsLong,ByValYAsLong,ByValmapXAsDouble,ByValmapYAsDouble)
SelectCaseMapOper
CasePan'
如果是漫游操作
Me.MapControl1.Pan
CaseMapOperations.ZoomIn'
如果是拉框放大
Me.MapControl1.Extent=Me.MapControl1.TrackRectangle
CaseMapOperations.ZoomOut'
如果是拉框缩小
DimpRectangleAsIEnvelope
DimpEnvelopeAsIEnvelope
DimnewWidth,newHeightAsInteger
WithMe.MapControl1
SetpRectangle=.TrackRectangle
newWidth=.Extent.Width*(.Extent.Width/pRectangle.Width)
newHeight=.Extent.Height*(.Extent.Height/pRectangle.Height)
SetpEnvelope=NewEnvelope
pEnvelope.PutCoords.Extent.XMin-((pRectangle.XMin-.Extent.XMin)*(.Extent.Width/pRectangle.Width)),_
.Extent.YMin-((pRectangle.YMin-.Extent.YMin)*(.Extent.Height/pRectangle.Height)),_
(.Extent.XMin-((pRectangle.XMin-.Extent.XMin)*(.Extent.Width/pRectangle.Width)))+newWidth,_
(.Extent.YMin-((pRectangle.YMin-.Extent.YMin)*(.Extent.Height/pRectangle.Height)))+newHeight
.Extent=pEnvelope
EndSelect
isExtentUpdated=True
PrivateSub放大_Click()
DimpCloneAsIClone
SetpClone=Me.MapControl1.Extent
SetpEnvelope=pClone.Clone'
创建Me.MapControl1.Extent的副本
pEnvelope.Expand0.5,0.5,True'
改变Envelope的大小
Me.MapControl1.Extent=pEnvelope
PrivateSub拉框放大_Click()
MapOper=ZoomIn
Me.MapControl1.MousePointer=esriPointerZoomIn
PrivateSub拉框缩小_Click()
MapOper=ZoomOut
Me.MapControl1.MousePointer=esriPointerZoomOut
PrivateSub漫游_Click()
MapOper=Pan
Me.MapControl1.MousePointer=esriPointerPan
PrivateSub全屏显示_Click()
Me.MapControl1.Extent=Me.MapControl1.FullExtent
PrivateSub缩小_Click()
SetpClone=Me.MapControl1.Extent'
pEnvelope.Expand2,2,True
(5)编程实现通过在图层控制面板上拖动图层改变图层的叠放顺序
PrivateSubTOCControl1_OnEndLabelEdit(ByValxAsLong,ByValyAsLong,ByValnewLabelAsString,CanEditAsBoolean)
IfLen(Trim(newLabel))<
>
0AndCanEdit=TrueThen
Else
CanEdit=False'
把图层名称设置为原先的值
EndIf
注意:
这里仅仅上修改MapControl中的图层名称,而不是数据库或文件
中的图层名称
PrivateSubTOCControl1_OnMouseDown(ByValbuttonAsLong,ByValshiftAsLong,ByValxAsLong,ByValyAsLong)
DimpLyrAsILayer
DimpIndexAsInteger
DimpMapAsIMap
DimpOtherAsIUnknown
DimpItemAsesriTOCControlItem
调用HitTest方法
Ifbutton=vbLeftButtonThen
Me.TOCControl1.HitTestx,y,pItem,pMap,pLyr,pOther,pIndex
IfpItem=esriTOCControlItemLayerThen'
如果点击的是图层才执行操作
IfpLyrIsNothingThenExitSub'
如果没有点击到图层
IfTypeOfplyerIsIAnnotationSublayer_
ThenExitSub'
如果点击的是注记层,则退出
SetpMovedLyr=pLyr'
记录被点击的图层,用于拖动
测试HitTest方法返回的参数值
图层数:
"
&
pMap.LayerCount&
"
类型:
pItem&
_
,Index:
pIndex&
,图层名称:
pLyr.Name
PrivateSubTOCControl1_OnMouseMove(ByValbuttonAsLong,ByValshiftAsLong,ByValxAsLong,ByValyAsLong)
DimpLayerAsILayer
DimpIndexAsVariant
实现调整图层顺序功能
If(button=vbLeftButton)Then
Me.TOCControl1.HitTestx,y,pItem,pMap,pLayer,pOther,pIndex
如果拖动的对象存在并且鼠标为系统光标样式,则更改为我们自定义的
“拖动光标”
IfpItem<
esriTOCControlItemNoneAndMe.TOCControl1.MousePointer_
<
esriPointerCustomThen
Me.TOCControl1.MousePointer=esriPointerCustom
'
SetMe.TOCControl1.MouseIcon=LoadResPicture("
MOVE"
vbResCursor)
PrivateSubTOCControl1_OnMouseUp(ByValbuttonAsLong,ByValshiftAsLong,ByValxAsLong,ByValyAsLong)
DimiAsInteger
DimcountAsInteger
IfTypeOfplyerIsIAnnotationSublayerThenExitSub
count=pMap.LayerCount
查找Mouse_Up位置的图层的Index
Fori=0Tocount-1
IfpLyrIspMap.Layer(i)ThenExitFor'
找到图层后退出
pMap.MoveLayerpMovedLyr,i'
移动被拖动的图层
更新TocControl
Me.TOCControl1.MousePointer=esriPointerDefault'
恢复鼠标
(6)鹰眼系统开发
PrivateSubSmallMap_UpDateData()
当主地图装载、卸载了数据或当主地图的图层顺序改变时,
调用次函数更新鹰眼图中的数据
count=.LayerCount
这里注意,一定要保证两个地图控件中,图层顺序一致
Me.SmallMap.AddLayer.Layer(i),i
Me.SmallMap.Extent=Me.SmallMap.FullExtent
PrivateSubDrawViewRectInSmallMap(ByValpEnvAsIEnvelope)
调用此方法在鹰眼中绘制一个红色的矩形方框,来标识视图在
地图中的位置
DimpCurEnvAsIEnvelope
DimpGContainerAsIGraphicsContainer
DimpActViewAsIActiveView
DimpElementAsIElement
DimpFillElementAsIFillShapeElement
DimpColorAsIColor
DimpOutLineAsILineSymbol
DimpFillSymbolAsIFillSymbol
SetpCurEnv=pEnv'
获得主地图的视图范围
SetpGContainer=Me.SmallMap.Map'
设置GraphicsContainer
SetpActView=Me.SmallMap.ActiveView'
获得视图对象,用于刷新
pGContainer.DeleteAllElements
SetpElement=NewRectangleElement'
创建要绘制的Element
pElement.Geometry=pCurEnv
设置矩形的的填充色[红色],即显示在鹰眼上的红色方框线的颜色
SetpColor=NewRgbColor
pColor.RGB=255'
红色
设置矩形的边框
SetpOutLine=NewSimpleLineSymbol
WithpOutLine
.Width=1
.Color=pColor
把矩形的填充色设置为透明
pColor.Transparency=0
设置面填充的符号,用于填充矩形
SetpFillSymbol=NewSimpleFillSymbol
WithpFillSymbol
.Outline=pOutLine
SetpFillElement=pElement
pFillElement.Symbol=pFillSymbol
绘制矩形方框
pGContainer.AddElementpElement,0
pActView.PartialRefreshesriViewGraphics,Nothing,Nothing
PrivateSubMapControl1_OnExtentUpdated(ByValdisplayTransformationAs_
Variant,ByValsizeChangedAsBoolean,ByValnewEnvelopeAsVariant)
CallDrawViewRectInSmallMap(newEnvelope)
实现通过对SmallMap的操作实现对MapControl1的控制。
代码如下:
PrivateSubSmallMap_OnMouseDown(ByValbuttonAsLong,ByValshiftAsLong,ByValXAsLong,ByValYAsLong,ByValmapXAsDouble,ByValmapYAsDouble)
m_move=True
DimpPtAsIPoint
SetpPt=Newpoint
pPt.PutCoordsmapX,mapY'
改变主地图视野范围
MapControl1.CenterAtpPt
PrivateSubSmallMap_OnMouseMove(ByValbuttonAsLong,ByValshiftAsLong,ByValXAsLong,ByValYAsLong,ByValmapXAsDouble,ByValmapYAsDouble)
Ifm_move=TrueThen
DimpPtAsIPoint
MapControl1.Cen


- 配套讲稿:
如PPT文件的首页显示word图标,表示该PPT已包含配套word讲稿。双击word图标可打开word文档。
- 特殊限制:
部分文档作品中含有的国旗、国徽等图片,仅作为作品整体效果示例展示,禁止商用。设计者仅对作品中独创性部分享有著作权。
- 关 键 词:
- 地理信息系统 编程 设计 报告
 冰豆网所有资源均是用户自行上传分享,仅供网友学习交流,未经上传用户书面授权,请勿作他用。
 《城市规划基本知识》深刻复习要点.docx
-
《高电压技术》word版.docx
-
《安全带》gb6095.docx
-
BCP计划应急计划.docx
-
《计算机组成与工作原理》第一章复习题.docx
-
CANON LBP系列激光打印机使用方法指南.docx
-
C语言课程设计火车票系统源代码.docx
-
3热力管道沟槽开挖方法.docx
-
HR岗位职责.docx
-
1 脱硫脱硝cems维护技术规范.docx
-
O2O超市商业项目计划书.docx
-
SCI期刊呼吸胸外.docx
-
18岁生日祝福语短信.docx
-
ITMC物流企业经营沙盘比赛规则.docx
-
XX钢绳成本管理.docx
-
Matlab的第三方工具箱大全强烈推荐.docx
-
安全保卫工作先进个人.docx
-
安全生产工作日记.docx
-
windows 漏洞集合.docx
-
Φ160数控落地镗铣床技术规格.docx
-
安全施工组织设计.docx
-
安全检查和隐患排查治理制度及记录.docx
-
部编版小学二年级语文下册课外阅读专项.docx
-
变电站投运前质量监督检查汇报材料模版.docx
-
版 创新设计 高考总复习 历史 北师大版第一部分 必考内容第十五单元 第38讲.docx
-
本科毕业设计论文.docx
-
北京大学社会心理学串讲笔记1一10章加试题.docx
-
亳州市教坛新星骨干教师学科带头人特级教师年度考核细则知识分享.docx
-
超星尔雅《人生与人心》期末考试满分答案.docx
-
财经法规与会计职业道德案例分析题.docx
-
茶文化会发言稿.docx
-
财务会计核算实习总结.docx
-
春季省考判断全程专项1226.docx
-
班主任工作手册完美模板.docx
-
版质量职业健康安全和环境管理体系内审检查表.docx
-
保洁的工作总结范文通用5篇.docx
-
北京户籍政策及户口办理.docx
-
北京市农业技术推广奖获奖项目名录.docx
-
北师大版一年级语文下册期末知识点整理复习练习及答案.docx
-
崩塌滑坡泥石流勘查大纲及报告编制要点.docx
-
毕业设计指导书湖南化工职业技术学院.docx
-
毕业同学录留言.docx
-
便道施工方案.docx
-
辩论赛策划书.docx
-
标书内技术服务和售后服务方案.docx
-
宾馆酒店监控方案.docx
-
饼碎集4婚恋驿站.docx
-
宾馆客房管理系统的设计与实现.docx
-
博士英语课程作业.docx
-
补充资料.docx
-
博物馆可行性研究报告.docx
